Ultimate Christmas Pudding Recipe (Easy, Rich & Foolproof)
Indulge in holiday magic with the ultimate Christmas pudding recipe. Follow our step-by-step guide to create a festive delight that's rich, flavorful, and perfect for your holiday celebrations.
Author:Callum FraserApr 27, 202524.8K Shares777.9K Views
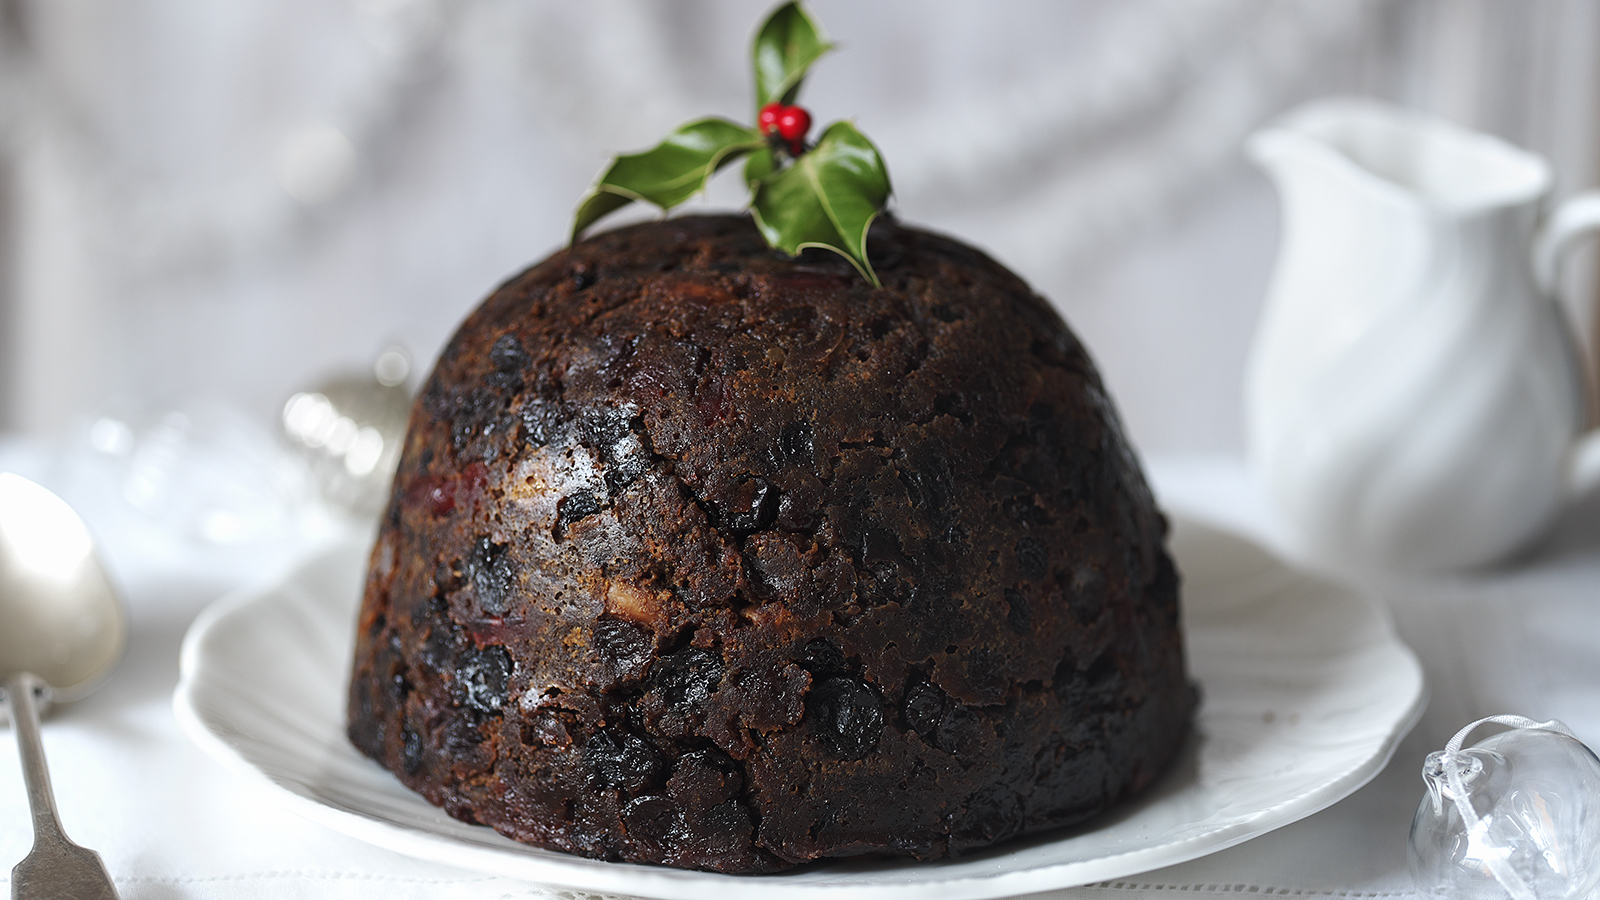
Few holiday desserts carry the same nostalgic warmth as a rich, dark, and boozy Christmas pudding. Christmas pudding, a traditional dessert that graces many holiday tables, is a rich, fruity, and flavorful treat that has been enjoyed for centuries.
Get ready to create a Christmas pudding that's anything but ordinary! This recipe is all about rich, deep flavors and a deliciously moist texture that'll have everyone reaching for seconds.
Join us on a fun, heartfelt cooking adventure to make a truly special holiday treat. For the best results, start a few weeks early as part of the classic "Stir-Up Sunday" tradition-a perfect way to kick off the festive season!
The History Of Christmas Pudding
Origins And Evolution
Christmas pudding, also known as plum pudding or figgy pudding, has its roots in medieval England. Originally, it was a porridge-like dish made with beef, mutton, and dried fruits. Over time, it evolved into the steamed or boiled pudding we know today, rich with suet, breadcrumbs, and spices.
Symbolism And Traditions
Christmas pudding is steeped in symbolism and tradition. It is often made on "Stir-up Sunday," the last Sunday before Advent, and families gather to stir the mixture, each making a wish. The pudding is traditionally steamed or boiled, wrapped in cloth, and then aged for several weeks, allowing the flavors to develop and deepen.
Equipment You’ll Need
- 1-litre (approximately 4 cup) pudding basin
- Baking paper and aluminum foil
- Kitchen string
- Large stock pot with a tight-fitting lid or a pressure cooker
- Steamer insert or an upturned heatproof saucer
Ingredients For A Traditional Christmas Pudding
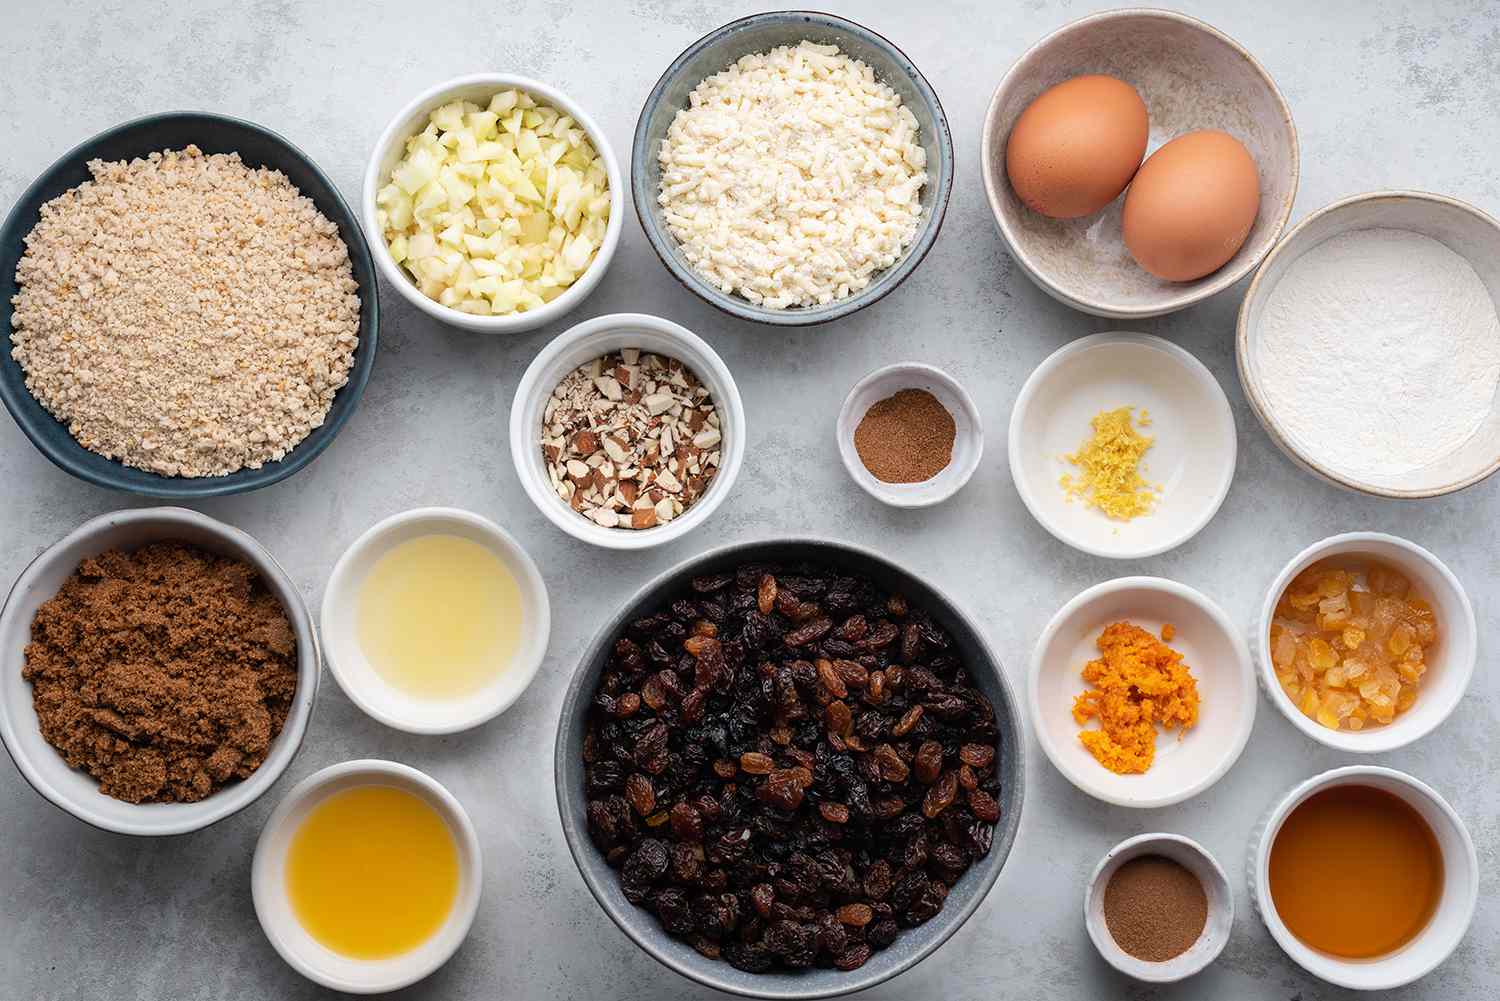
To make a traditional Christmas pudding, you will need the following ingredients:
Core Ingredients
- 250g suet or grated butter (for a vegetarian option)
- 200g (1 cup) dark brown sugar
- 250g (1 1/2 cups) mixed dried fruit (currants, raisins, sultanas)
- 100g (1/2 cup) chopped dates or figs
- 75g (1/2 cup) chopped nuts (walnuts or almonds)
- 100g (1 cup) fresh breadcrumbs
- 100g (3/4 cup) plain flour
- 100g (1/2 cup) shredded suet (or grated frozen butter)
- 2 tsp mixed spice
- 1 tsp cinnamon
- 1/4 tsp nutmeg
- 1/4 tsp salt
Wet Ingredients:
- 2 large eggs
- 100ml (1/2 cup) stout or dark beer
- 75ml (1/3 cup) brandy or dark rum
- 1 small grated apple
- Zest of 1 lemon and 1 orange
Optional:
- 1 tbsp black treacle or molasses (for deeper flavor)
- 1 tsp vanilla extract
Step-by-Step Christmas Pudding Recipe
Step 1: Prep The Fruit (Ideally 24-48 Hours Ahead)
Soak all the mixed dried fruit, chopped dates or figs, lemon zest, orange zest, and grated apple in the brandy or dark rum and stout or dark beer overnight (or for at least a few hours). This allows the fruit to plump up and absorb the alcohol and citrus flavors.
Step 2: Mix The Dry Ingredients
In a large mixing bowl, combine the finely shredded suet (or grated cold butter), dark brown sugar, fresh breadcrumbs, plain flour, mixed spice, ground cinnamon, ground nutmeg, salt, and chopped nuts. Mix thoroughly with your fingertips until the mixture resembles coarse breadcrumbs and all the ingredients are evenly distributed.
Step 3: Incorporate Wet Ingredients
Add the lightly beaten eggs and the rich molasses (or treacle) to the bowl of dry ingredients. Mix everything together thoroughly until a cohesive batter forms.
Step 4: Combine Dry Ingredients And Fruits
Add the fruit mixture to the bowl with the dry ingredients and mix thoroughly until all the fruit is evenly distributed.
Step 4: Steaming The Pudding
- Prepare the Pudding Basin: Grease a 1.2-liter (2-pint) pudding basinwith butter. Spoon the mixture into the basin, pressing down gently to ensure there are no air pockets.
- Cover the Pudding: Cut a circle of baking paper large enough to cover the top of the basin with an overhang. Pleat the center of the paper to allow for expansion. Place this over the basin and then cover tightly with a layer of aluminum foil. Crimp the edges of the foil tightly around the rim of the basin to create a seal. Secure the covering with kitchen string tied around the rim, creating a handle for easy lifting if desired.
- Steam the Pudding: Place the pudding basin on a steamer insert or an upturned heatproof saucer in a large stockpot with a tight-fitting lid. Pour in enough boiling water to come halfway up the sides of the basin. Cover the pot tightly and bring the water to a gentle simmer. Steam for 6 hours, checking the water level regularly (every hour or so) and topping up with more boiling water as necessary to maintain the level. The water should remain at a gentle simmer throughout the steaming process.
Alternative Cooking Methods:
- Bain-Marie (Oven):Preheat your oven to 140°C (285°F). Place the covered pudding basin in a deep roasting pan. Pour boiling water into the roasting pan until it reaches halfway up the sides of the pudding basin. Bake for 6-8 hours.
- Slow Cooker:Follow your slow cooker's instructions for steaming. Typically, you'll place the basin on a trivet with some water in the bottom and cook on low for a longer duration (8-10 hours).
Also Check Out: How To Make Christmas Pudding In The Microwave
Step 5: Storing And Aging The Pudding
- Cool the Pudding: After steaming, remove the pudding basin from the saucepan and let it cool completely.
- Store the Pudding: Replace the parchment and foil with fresh layers and secure again with string. Store the pudding in a cool, dark place for at least 4 weeks, allowing the flavors to mature.
Prefer to watch the process? Here’s a helpful video guide:
Super Easy Christmas Pudding Recipe | Plum Pudding Recipe |Easy Christmas Dessert
Step 6: Reheating And Serving With Flair
As Christmas Day dawns, the final act in the creation of your magnificent Christmas pudding is the reheating and serving – often with a touch of celebratory flair.
- Reheating:On Christmas Day, steam the matured pudding again for 2 to 3 hours until it is thoroughly heated through and piping hot. Ensure the water in your steamer is at a gentle simmer and doesn't boil dry. For individual slices, you can gently reheat them in a microwave on a low setting.
- Turning Out:To serve your masterpiece, carefully run a thin, flexible knife around the inside edge of the pudding basin to loosen it. Place a warmed serving plate directly over the top of the basin and quickly invert it. If the pudding doesn't release immediately, give the bottom of the basin a gentle tap.
- Reheat the Pudding: On Christmas Day, re-steam the pudding for 2 hours before serving. Alternatively, you can microwave it on medium power for 10-15 minutes, ensuring it is heated through.
The Flambé (Optional But Spectacular)
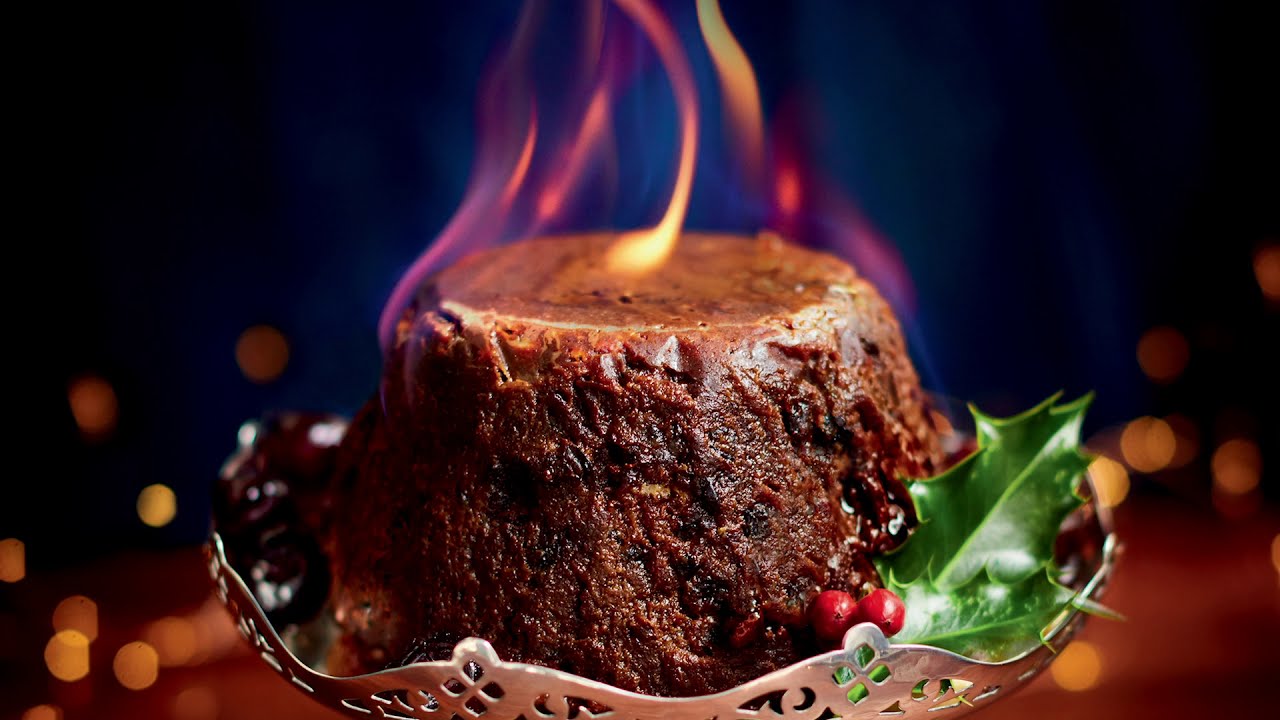
For a truly dramatic presentation that will delight your guests, warm a few tablespoons of brandy in a ladle over a gentle heat (exercise extreme caution and do not allow it to boil).
Once the brandy is warm, carefully ignite it with a long match and immediately pour the flaming brandy over the top of the turned-out pudding. The impressive flames will subside as the alcohol burns off, leaving behind a wonderful aroma and a subtle caramelized flavor.
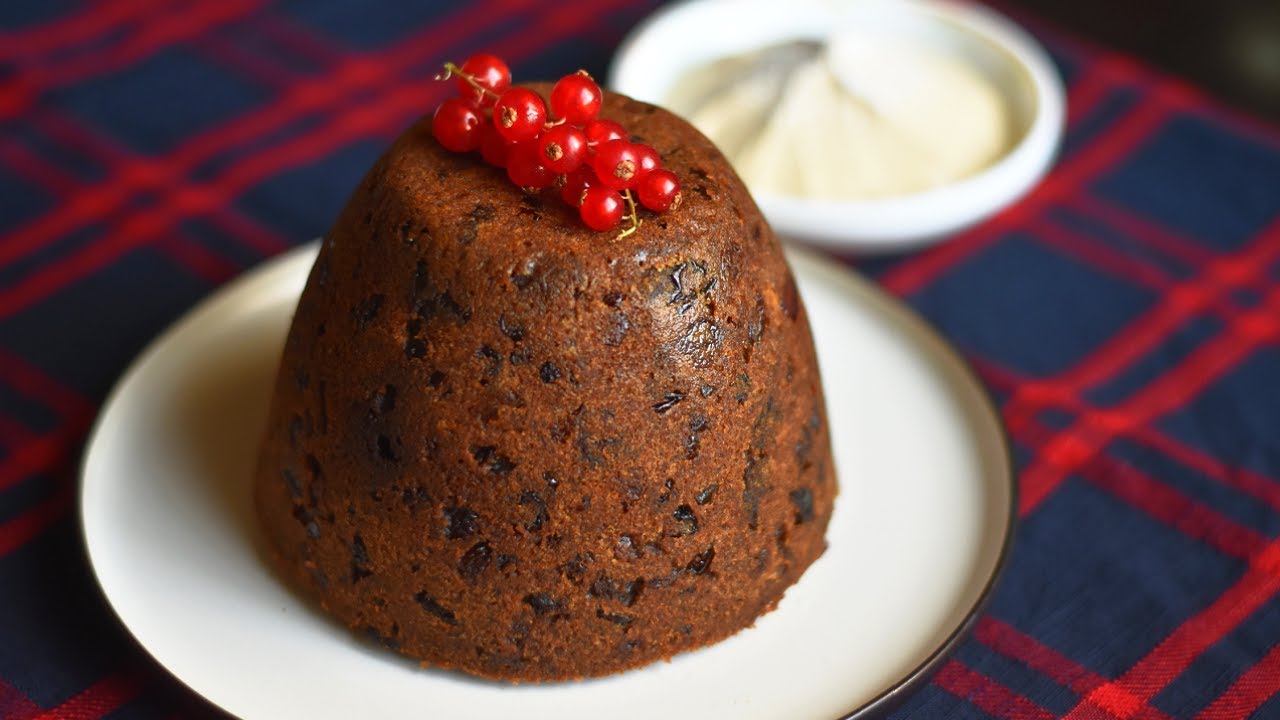
Serving Suggestions
Traditional Toppings:
- Brandy butter
- Warm custard
- Double cream
- Vanilla ice cream
Festive Pairings:
- Mulled wine
- Spiced cider
- Port or sherry
Related Reading: Traditional Christmas Cake Recipe - A Festive Delight
Dietary Variations
Vegan Christmas Pudding:
- Replace suet with vegan suet or coconut oil
- Use flaxseed egg (1 tbsp flax + 3 tbsp water per egg)
- Substitute beer with apple juice
Gluten-Free Option:
- Use gluten-free breadcrumbs and flour
- Check all labels for gluten-free certification
Alcohol-Free Version:
- Soak fruits in orange juice or tea
- Omit alcohol in the batter
Troubleshooting Your Christmas Pudding
Pudding Is Too Dry
Ensure you have used the correct amount of liquid in the recipe and that the pudding basin was tightly covered during steaming to prevent moisture loss. Check the water level regularly during steaming and top up with boiling water as needed.
Pudding Is Too Wet
This could indicate too much liquid in the recipe or insufficient steaming time. Double-check your measurements and ensure you steam for the recommended duration.
Pudding Didn't Rise (it Shouldn't Rise Significantly)
Christmas pudding is a dense, steamed pudding and will not rise like a cake. Its texture should be moist and heavy.
Fruits Sank To The Bottom
Ensure the batter has a thick enough consistency to suspend the fruit. Coating the fruit in a little flour before adding it to the batter can sometimes help. Avoid over-stirring the batter once the fruit is added.
Pudding Cracked
This can happen if the steaming is too vigorous, causing rapid expansion, or if there wasn't enough space left at the top of the basin for expansion. Ensure a gentle simmer and leave the recommended headspace.
FAQs About Christmas Pudding Recipe
How Far In Advance Can I Make Christmas Pudding?
You can make Christmas pudding several weeks or even months in advance. The traditional practice is to make it on Stir-up Sunday, the last Sunday before Advent, which allows the pudding to mature for at least a month. Some people even make it a year ahead!
Can I Reheat Christmas Pudding In A Microwave?
Yes, you can reheat Christmas pudding in a microwave. Place the pudding in a microwave-safe bowl, cover with microwave-safe wrap or a damp paper towel, and heat on medium power for 10-15 minutes, or until heated through.
What Can I Use Instead Of Suet In Christmas Pudding?
If you prefer not to use suet, you can substitute it with grated butter or vegetable shortening. Ensure the butter is cold and grated to maintain the pudding's texture.
What Is The Best Way To Store A Christmas Pudding?
Once your cooked pudding has cooled completely, wrap the basin tightly with a fresh double layer of parchment paper or aluminum foil. Store it in a cool, dark, and dry place. Properly stored, a Christmas pudding can last for several months, and some even believe the flavor improves over a longer storage period.
How Do I Know When My Christmas Pudding Is Done Steaming?
The pudding is done when it has a firm, slightly springy texture. You can test it by inserting a skewer into the center; it should come out clean. The pudding will also pull away slightly from the sides of the basin.
Can I Make A Gluten-free Christmas Pudding?
Yes, you can make a gluten-free Christmas pudding by using gluten-free flour and gluten-free breadcrumbs. Ensure all other ingredients, such as the mixed peel and spices, are also gluten-free.
Conclusion
Creating the perfect Christmas pudding is a labor of love that rewards you with a rich, flavorful dessert steeped in tradition. With this easy-to-follow guide, you’ll craft a rich, delicious pudding that’s sure to steal the show. From selecting the best ingredients to perfecting the steaming process, every step contributes to a pudding that will be the highlight of your festive table.

Callum Fraser
Author
Callum Fraser isn't just a writer about Scotland; he's a product of its rugged landscape and rich history. Born and raised in Perthshire, with the Highlands as his backyard, his love for the nation's stories was kindled by local storytellers and long walks through ancient glens.
This passion led him to pursue a degree in Scottish History from the University of Edinburgh. For over 15 years, Callum has dedicated himself to exploring and documenting his homeland, fusing his academic knowledge with essential, on-the-ground experience gained from charting road trips through the Cairngorms, hiking the misty Cuillins of Skye, and uncovering the secrets of traditional recipes in his family's kitchen.
As the Editor-in-Chief and Lead Author for Scotland's Enchanting Kingdom, Callum's mission is simple: to be your most trusted guide. He combines meticulous research with a storyteller's heart to help you discover the authentic magic of Scotland — from its best-kept travel secrets to its most cherished traditional recipes.
Latest Articles
Popular Articles