How To Create A Memorable Cheeseboard | From Selection To Presentation
A cheeseboard isn’t just about throwing a few cheeses on a platter; it’s an art that involves pairing flavors and textures, considering colors and shapes, and understanding how different elements interact. Getting it right transforms your cheeseboard from ordinary to unforgettable.
Author:Callum FraserSep 20, 2025847 Shares141.2K Views
Mastering The Art Of Cheeseboard Creation
I've been creating cheeseboards for dinner parties and family gatherings for over fifteen years, and I've learned that the difference between a forgettable platter and one that becomes the evening's talking point lies not in expensive ingredients, but in understanding the fundamental principles of flavor balance, visual composition, and thoughtful curation.
The moment I stopped throwing random cheeses on a board and started thinking like a curator, considering how each element enhances the others, my cheeseboards transformed from simple appetizers into memorable experiences. What most people don't realize is that creating an exceptional cheeseboardrequires the same attention to detail as crafting a well-balanced menu.
Each cheese tells a story through its texture, intensity, and origin, while accompaniments serve as supporting actors that either enhance or compete with these starring flavors. I've watched too many well-intentioned hosts overwhelm their guests with chaotic combinations that fight for attention rather than work in harmony.
Key Takeaways
- Balance five flavor profiles: mild, sharp, creamy, aged, and something unique or bold.
- Include three texture categories: soft, semi-hard, and hard cheeses for variety.
- Plan 3-4 ounces of cheese per person for appetizer portions, 6-8 ounces for main course.
- Create visual anchors using odd numbers and height variations across your board.
- Temperature matters: serve cheeses at room temperature for optimal flavor development.
- Seasonal adaptation enhances the relevance and availability of complementary ingredients.
- Wine pairing follows intensity matching: light cheeses with light wines, bold with bold.
- Budget-conscious selections can create impressive results through strategic curation.
What Is A Cheeseboard? Understanding Its Art And Purpose
At its core, a cheeseboard is a curated selection of cheeses served alongside complementary accompaniments, arranged thoughtfully on a board or platter. Unlike a simple cheese platter, which might just be a random collection of items, a cheeseboard focuses on harmony, melding flavors, textures, and colors into an experience greater than the sum of its parts.
Cheeseboards hold an esteemed place in dining cultures worldwide. In France, cheese courses often conclude meals, celebrated like fine art. In Italy, antipasti offer cheeses with cured meats and olives. Modern foodie culture has embraced cheeseboards as adaptable social fare, easy to prepare but elegant enough to impress.
What’s particularly special about cheeseboards is their versatility. They cater to quick snacks, sophisticated dinners, casual sharing, and ceremonial celebrations. A cheeseboard becomes a bridge connecting different tastes and backgrounds, making it perfect for entertaining. By understanding the basics of cheeseboard composition, you’ll unlock the confidence to create your own works of edible art that elevate any occasion.
Essential Components Of A Cheeseboard
Crafting a memorable cheeseboard requires attention to each element, from cheese selection to complementary items. Here’s a detailed look at the essentials:
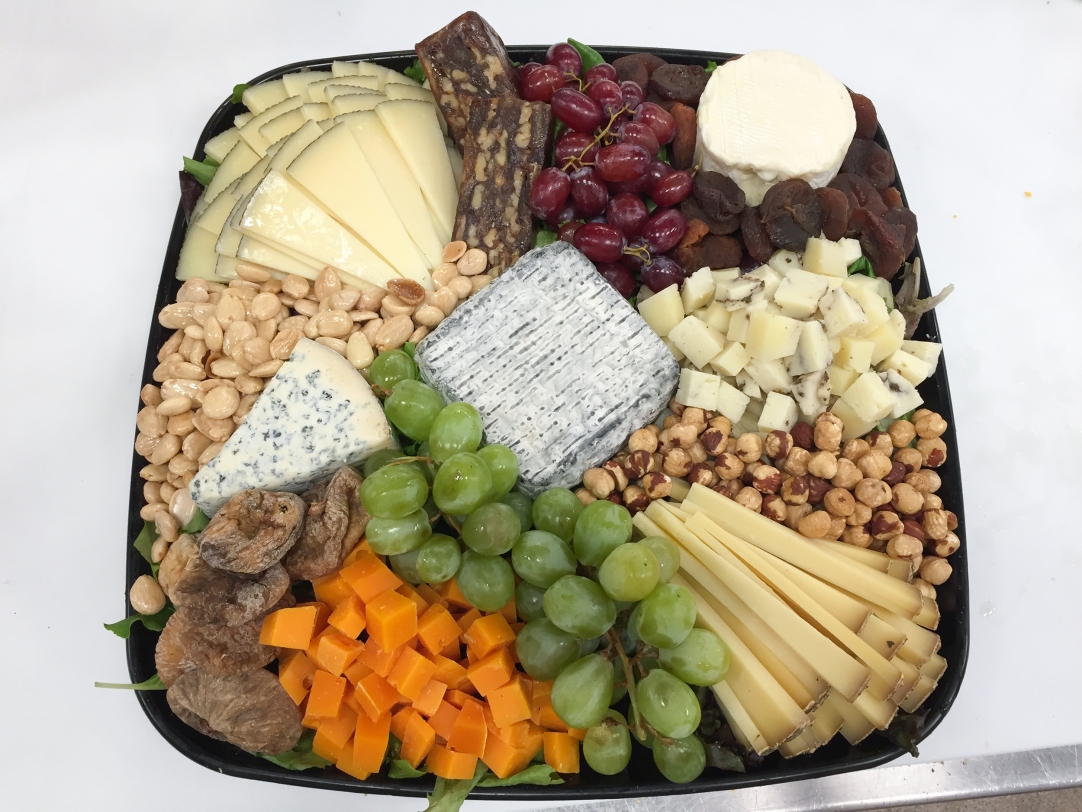
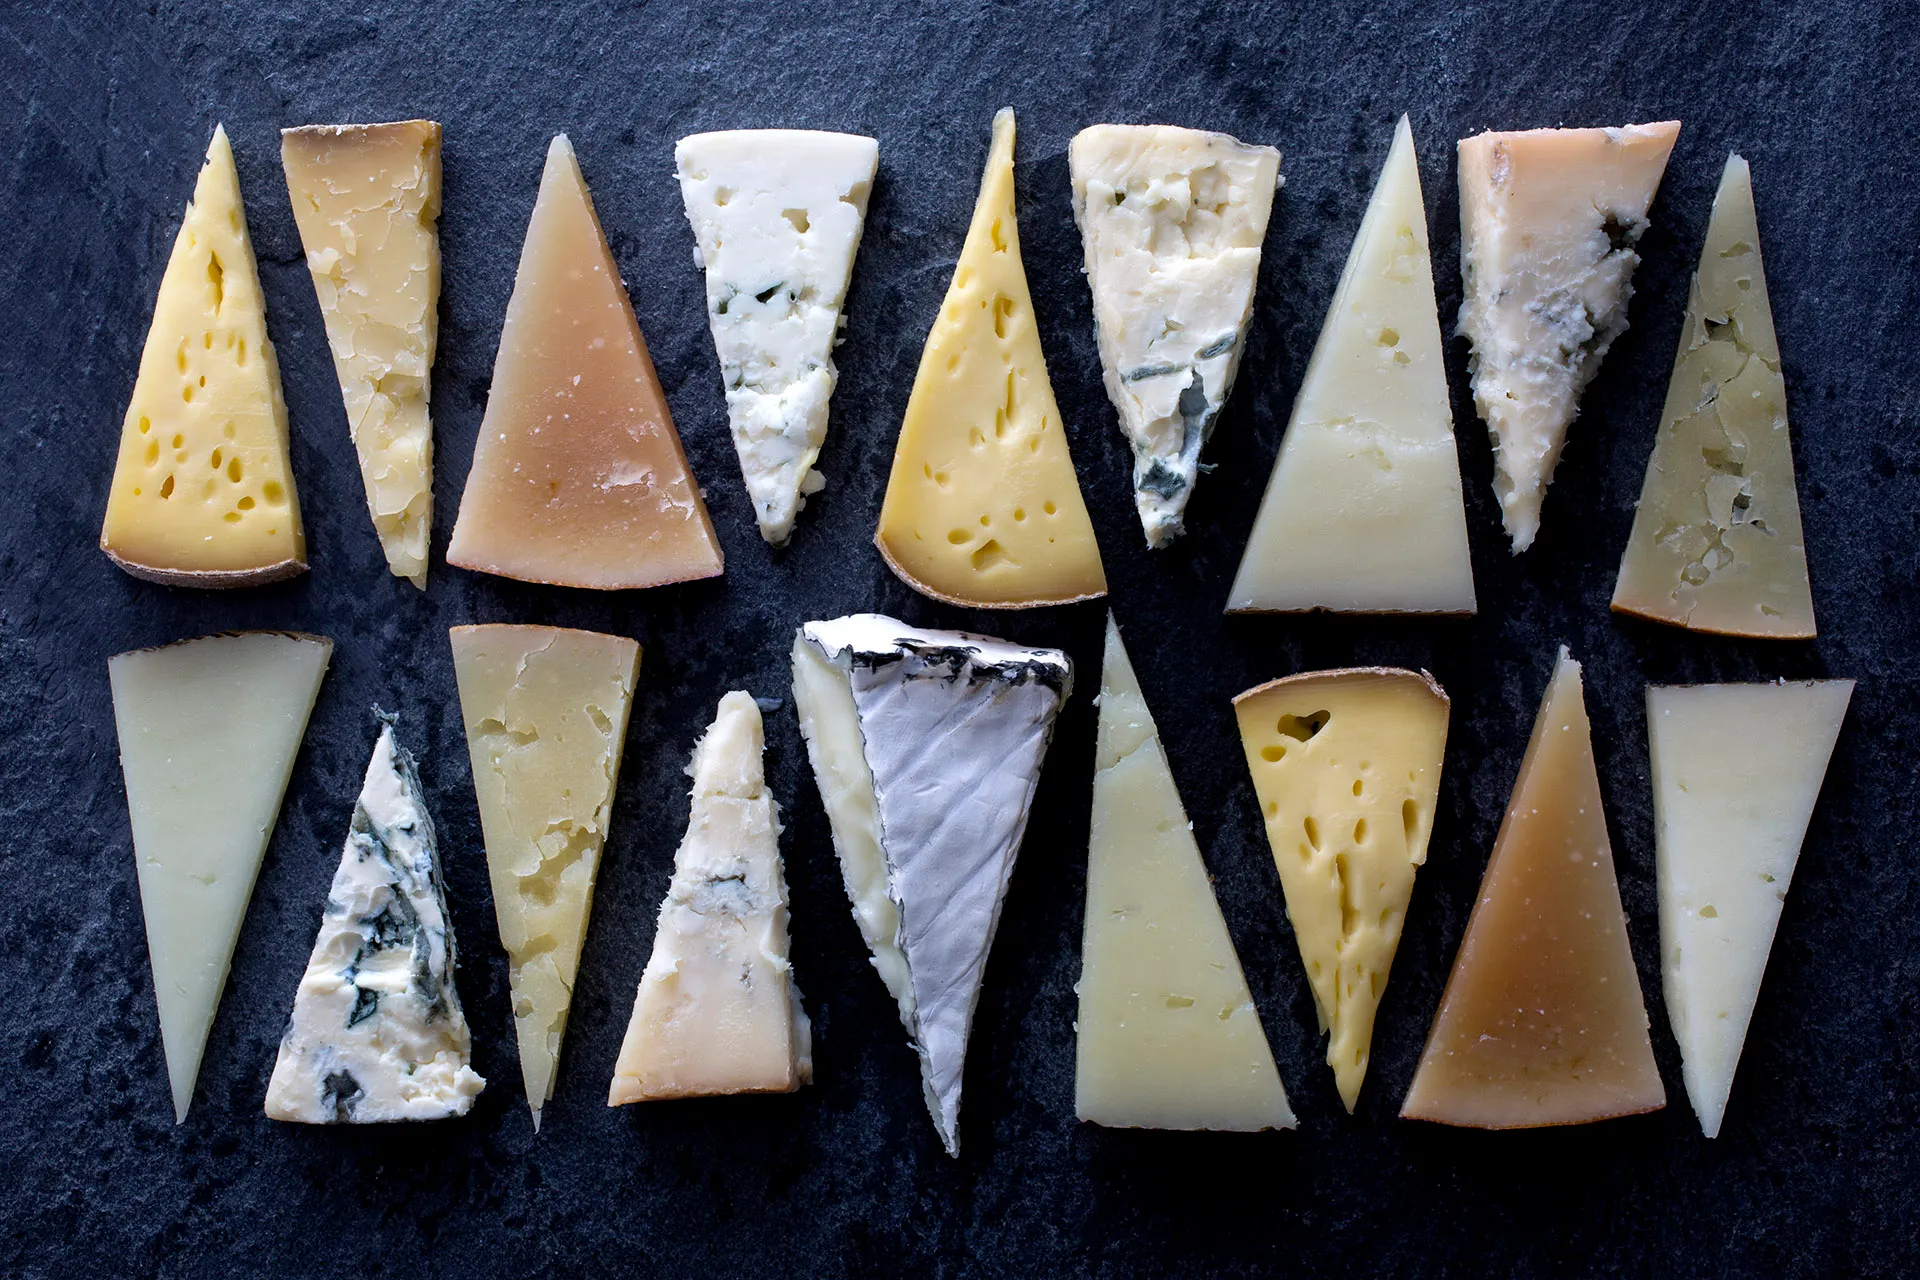
Cheese Varieties: Building A Balanced Selection
Choosing the right cheeses is the backbone of a great cheeseboard. Aim for variety to cover a spectrum of flavors and textures:
- Soft Cheeses: Creamy and mild, like Brie, Camembert, or Burrata. Their smooth texture pairs well with crunchy or fruity accompaniments.
- Hard Cheeses: Firmer and often aged, such as Cheddar, Manchego, or Parmesan. They bring bite and saltiness, offering contrast to milder cheeses.
- Blue Cheeses: Bold, tangy, and veined with mold, examples include Roquefort, Stilton, and Gorgonzola. Blue cheesesadd a powerful punch and complexity.
- Fresh Cheeses: Light and slightly tangy cheeses like goat cheese or fresh mozzarella introduce brightness and freshness.
Aim for 3-5 cheeses for a typical board, including at least one from each category if possible. This variety satisfies different tastes and adds depth.
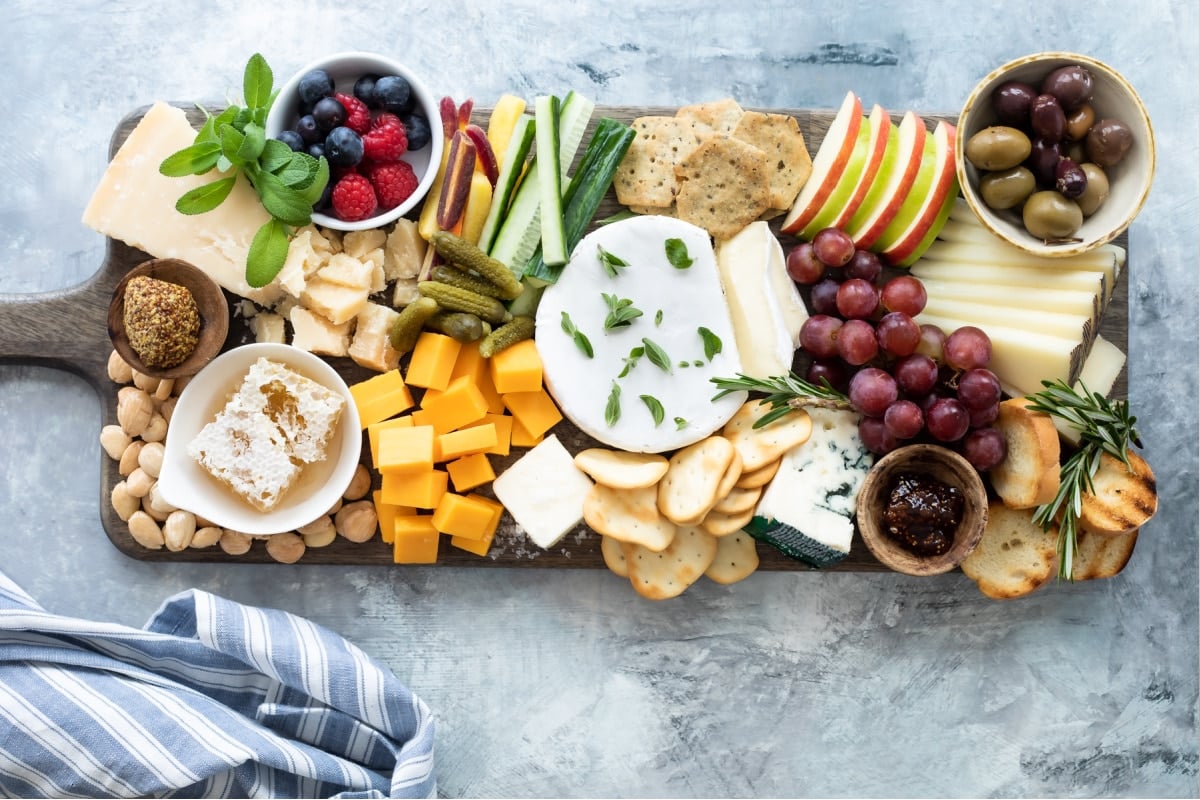
Complementary Elements: Enhancing Flavors And Textures
Cheeses shine brightest when paired with complementary foods that add contrast and balance:
- Cured Meats: Salami, prosciutto, and chorizo contribute savory richness and chewiness.
- Crackers and Breads: A variety of textures, from crispy crackers to rustic baguette slices, provide a sturdy base.
- Fresh Fruits: Grapes, apple slices, berries, and figs offer sweetness and juiciness.
- Dried Fruits and Nuts: Apricots, dates, almonds, and walnuts create chewiness and crunch.
- Preserves and Condiments: Honey, fig jam, mustard, and chutneys provide bursts of flavor and help cut richness.
Combining these with your cheeses amplifies enjoyment and creates a more dynamic tasting experience.
5 Steps To Making A Stunningly Beautiful Cheese Board

How to Make The Worlds Greatest Cheese Board!!
1. Before Picking Your Cheeses, Know Your Audience
This part doesn’t really change how your cheese board looks, but as someone who works with cheese every day, I need to say this loud and clear: serve cheeses that people will actually enjoy.
Are the people you’re serving open to trying new and unusual cheeses? Are there vegetarians in the group? Is there someone who might completely freak out if they see blue cheese all over the board? Do they even know what raw milk cheese is? These are all important questions.
The real secret to a great cheese board starts with talking to your local cheesemonger. That’s us, the cheese experts at the counter. We’re here to help you pick the perfect cheeses for your group. Don’t be shy, ask us anything. Okay, so now you’ve picked your cheeses.
The step-by-step photos you see in this article were taken at my job, where I was putting together cheese boards for holiday parties. Since I didn’t know exactly who would be eating them, I chose cheeses that almost everyone likes. I stayed away from blue cheeses and washed-rind cheeses.
Why? Blue cheeses tend to crumble everywhere, and washed-rind cheeses can get soft and start to ooze. I had to make about ten cheese boards in just two hours, so I wanted to work with firmer cheeses. That way, if I needed to move things around on the board to make it look better, I could do it easily without making a mess.
2. Prep All Your Ingredients
Before you start arranging anything, get all your ingredients ready and laid out in front of you. This helps you see exactly how much you have to work with, so you can plan your board better. Since these photos show a professional setup, I’m using a disposable platter. But if I were doing this at home, I’d use one of my wooden cutting boards or another simple, matte-finish platter. A plain background like that also helps if you want to take nice photos of your cheeseboard later.
3. Slicing The Cheese
My favorite thing to do on a cheese board is to arrange cheese wedges in a fan shape. You can point them in any direction you like, or even make them spiral out from the center. I like to imagine my spiral cheese designs look like the Milky Way galaxy, like the universe’s own cheese board.
Cheeses With Edible Rinds
If the rind tastes good, you can cut your wedge right down the middle before slicing it thinly. Then, arrange the slices so some have the rind facing up and others have it facing down. This adds nice texture and visual interest to your board. For soft, bloomy rind cheeses (like Brie), you have two choices: leave them whole and uncut, or place them in a spot where, if they start to soften and ooze a little before the party, they won’t make a mess.
Whole Cheeses
I don’t trust anyone, not even myself, to leave a whole small cheese like Langherino (the soft cheese shown on this board) or a mini Camembert alone. Someone will definitely grab the whole thing. So I usually cut into them ahead of time to avoid that.
4. Add Charcuterie
Now that your cheeses are arranged nicely, it’s time to add charcuterie. If you don’t eat meat, don’t worry, I’ll talk about what to do instead a little later. Everyone loves a salami rose; it looks fancy and fun. But when you’re making ten cheese boards in two hours, you learn to take a few shortcuts.
Here’s what I do: I take about three thin slices of salami, stack them on top of each other, fold them in half, and then roll them up. It’s not a perfect rose, but it fills up empty spaces on the board quickly. Just be careful, these little rolls love to come undone. You have to work fast.
If they start to look messy, I’ll tuck a nut or a piece of fruit next to them to hold them in place like a little wall. If you have more time, or you’re only making one or two boards, I really recommend learning how to make a real salami rose. Look it up online, you can make one using a glass or without one. Just don’t forget to use toothpicks to hold it together.
5. Fill In The Negative Space
I really love using fruits and vegetables that are in season when I make cheese boards for myself and my friends. In fact, since most of my friends don’t eat meat, I usually skip the charcuterie altogether. Instead, I fill my boards with lots of colorful fruit and tasty spreads. I think this makes the board look even more alive and beautiful.
Fruit
Apples and pears can turn brown after you cut them, and that can make your board look old or tired. Berries, both fresh and dried, are perfect for tucking into small, tricky spots on the board.
Vegetables
Don’t be afraid to add vegetables. I love putting purple carrots and bright, colorful beets on my boards; they taste amazing with cheese. If you’re adding olives, pour just a teaspoon of olive oil over them. That keeps them from drying out and helps them stay shiny and appetizing. If you want to add flowers for decoration, make sure they’re safe to eat.
Never put anything on a party platter that isn’t edible; that’s a big no-no. And don’t forget to talk to your cheesemonger! They might have some great suggestions for pairings that go perfectly with the cheeses you picked, and those items might be sitting right there on the shelf behind you.
How To Select And Arrange Cheeses Like A Pro
With varieties chosen, the next step is selection and arrangement for flavor and visual impact.
Selecting Cheeses Based On Flavor Profiles And Milk Types
- Cow’s Milk Cheeses: Typically creamy and mild or sharp and aged, versatile and appealing to many tastes.
- Goat’s Milk Cheeses: Often tangy and firm with a slightly earthy flavor, excellent for fresh or aged categories.
- Sheep’s Milk Cheeses: Rich and buttery, examples include Pecorino and Manchego.
Supporting Local And Artisanal Producers
Seek out local cheesemakers or regional specialties for unique flavors. Artisan cheeses often have richer terroir expressions that boost the cheeseboard’s character. Visiting farmers' markets or reputable cheese shops allows you to ask for recommendations and discover new favorites. Vegan cheeseis also a good substitute for the usual cheese on a cheeseboard.
Arranging For Ease And Elegance
- Arrange cheeses spaced apart on the board to distinguish each one visually.
- Pre-cut some harder cheeses into wedges or slices to encourage sampling, especially if guests are unfamiliar with them.
- Group accompaniments in small bowls or clusters, balancing colors, shapes, and textures around cheeses.
- Label cheeses with small markers or tags for guest convenience and conversation starters.
- Provide separate cheese knives for each category: a soft cheese spreader, a cheddar slicer, and a fork or knife for blue cheeses. This avoids flavor cross-contamination and facilitates smooth serving.
Pairing Beverages: Wines, Beers, And More
No cheeseboard is complete without thoughtful drink pairings.
Wine Pairings
- White Wines: Crisp Sauvignon Blanc matches fresh cheeses; rich Chardonnay complements creamy Brie.
- Red Wines: Lighter Pinot Noir works well with aged cheeses; bolder Cabernet Sauvignon pairs with strong, hard cheeses.
- Sparkling Wines: Champagne or Prosecco refreshes the palate and pairs surprisingly well with many cheeses.
Beer Pairings
- Pilsners, wheat beers, and saisons pair beautifully with soft cheeses.
- Strong ales and porters complement blue cheeses and aged hard cheeses due to their robust flavors.
Other Options
- Cider: Offers a fruity tanginess that pairs well with sharp and creamy cheeses.
- Non-alcoholic: Sparkling water with lemon, herbal teas, or gourmet sodas can provide refreshing contrasts.
Presentation And Styling: Making Your Cheeseboard Visually Stunning
The visual appeal draws guests in and elevates the eating experience.
Board Choices
Wooden boards add warmth; slate boards provide a modern aesthetic; marble slabs feel elegant. Pick one that fits your occasion and theme.
Design Principles
- Use color contrasts such as the white of Brie against dark grapes or red meats against pale crackers.
- Create layers with height in mind, stack crackers or pile nuts for dimension.
- Use garnishes like fresh herbs, edible flowers, or pomegranate seeds for pops of color.
Special Occasion Cheeseboard Ideas
Tailor cheeseboards for holidays, seasons, or themes:
- Winter Holidays: Add spiced nuts, dried cranberries, and mulled wine accompaniments.
- Summer Gatherings: Include fresh berries, light cheeses, and chilled white wines.
- Romantic Evenings: Use luxurious truffle cheeses, champagne, and chocolate-covered fruits.
- Dietary Preferences: Vegan cheese boards with nut-based cheeses and fresh veggies.
Adapting your cheeseboard to the occasion shows attention to detail and care.
Common Mistakes And How To Avoid Them
- Overcrowdingthe board reduces visual appeal and risks mixed flavors.
- Serving cheeses too cold or too warmdiminishes flavor; room temperature is key.
- Ignoring knife hygieneleads to flavor contamination.
- Not planning quantities may cause waste or shortages; calculate carefully.
- Lack of labelingcan confuse guests and reduce enjoyment.
Being mindful of these ensures your cheeseboard shines.
You Might Like: Scottish Cheese Scones Recipe
Frequently Asked Questions
How Much Cheese Should I Buy Per Person For A Cheeseboard?
Plan 3-4 ounces of cheese per person when serving as appetizers before a meal, or 6-8 ounces per person when the cheeseboard serves as the main attraction. I typically round up slightly to ensure adequate portions, especially when hosting enthusiastic cheese lovers who might consume more than average amounts. Consider your guest list's preferences and the occasion's formality when adjusting these guidelines up or down.
Can I Prepare A Cheeseboard The Day Before My Event?
Most elements can be prepared ahead, but final assembly works best on serving day for optimal appearance and food safety. I arrange non-perishable items like crackers, nuts, and preserves the day before, then add cheeses and fresh elements 2-3 hours before guests arrive. This approach maintains food quality while reducing last-minute stress during entertaining preparation.
What's The Best Way To Store Leftover Cheese After A Party?
Wrap different cheese types in appropriate materials—wax paper for hard cheeses, plastic wrap for soft varieties—and store them separately to prevent flavor transfer. Most leftover cheese keeps 3-5 days refrigerated and can be repurposed in cooking, sandwiches, or smaller subsequent cheese presentations. Remove any contaminated portions that contacted serving utensils or guest hands before storage.
How Do I Accommodate Dietary Restrictions On A Cheeseboard?
Label cheeses clearly, especially noting milk types for lactose-intolerant guests, and include dairy-free alternatives like nut-based spreads or hummus. Provide separate serving utensils for each item to prevent cross-contamination, and consider including gluten-free crackers alongside traditional options. Communicate with guests beforehand to understand specific needs and plan accordingly.
What's The Proper Etiquette For Serving And Eating From A Cheeseboard?
Provide appropriate knives for each cheese type and encourage guests to use separate utensils for different selections to maintain flavor integrity. Take modest portions initially, allowing others to sample before returning for favorites. Cut soft cheeses from the point rather than removing the entire rind, and avoid double-dipping or contaminating serving pieces.
How Far In Advance Can I Shop For Cheese Without Compromising Quality?
Hard-aged cheeses can be purchased 5-7 days ahead and actually improve slightly during proper storage, while soft-ripened cheeses should be bought 2-3 days maximum before serving for optimal ripeness. Fresh cheeses require same-day or next-day purchase for best quality. Plan shopping trips based on cheese types in your selection to optimize freshness and flavor development.
What Wine Should I Choose If I'm Serving Many Different Cheese Types?
Champagne or quality sparkling wine pairs excellently with diverse cheese selections, providing acidity that cleanses palates while complementing both mild and strong varieties. Alternatively, choose a medium-bodied red like Côtes du Rhône or a crisp white like Sauvignon Blanc that won't overwhelm lighter cheeses while still complementing aged selections effectively.
How Can I Create An Impressive Cheeseboard On A Tight Budget?
Focus on fewer, higher-quality selections rather than numerous mediocre options, and supplement with homemade elements like seasoned nuts or simple chutneys. Shop warehouse stores for aged cheeses and standard varieties, then add one special selection from a local producer or cheese shop. Strategic use of seasonal fruits and attractive presentation can make modest selections appear abundant and sophisticated.
Should I Include Information Cards About The Cheeses I'm Serving?
Provide basic information about cheese names, origins, and milk types, especially for unfamiliar varieties, but avoid overwhelming guests with excessive details. Simple tent cards or a small chalkboard with key information help curious guests make informed selections while accommodating dietary restrictions. Keep descriptions brief and focus on practical information rather than extensive historical details.
How Do I Know When Soft Cheeses Are Perfectly Ripe For Serving?
Soft-ripened cheeses like Brie and Camembert should yield slightly to gentle pressure while maintaining structural integrity, with no strong ammonia odors that indicate over-ripeness. The interior should be creamy but not runny, and any white mold should appear fresh rather than dried or discolored. When in doubt, purchase these cheeses from knowledgeable cheese shop staff who can guide ripeness timing for your specific serving date.
Conclusion
Creating memorable cheeseboards isn't about expensive ingredients or professional training; it's about understanding fundamental principles of balance, presentation, and guest consideration that transform simple cheese selections into extraordinary experiences.
The techniques I've shared have consistently produced impressive results across hundreds of gatherings, from intimate dinners to large celebrations, proving that thoughtful curation matters more than premium pricing.
Remember that confidence builds through practice, and each cheeseboard presents opportunities to refine your skills and develop personal preferences that reflect your hosting style. Start with basic principles, focus on quality over quantity, and pay attention to your guests' reactions to understand what works best for your particular entertaining situations and social circles.
Jump to
Mastering The Art Of Cheeseboard Creation
Key Takeaways
What Is A Cheeseboard? Understanding Its Art And Purpose
Essential Components Of A Cheeseboard
5 Steps To Making A Stunningly Beautiful Cheese Board
How To Select And Arrange Cheeses Like A Pro
Arranging For Ease And Elegance
Pairing Beverages: Wines, Beers, And More
Presentation And Styling: Making Your Cheeseboard Visually Stunning
Common Mistakes And How To Avoid Them
Frequently Asked Questions
Conclusion

Callum Fraser
Author
Callum Fraser isn't just a writer about Scotland; he's a product of its rugged landscape and rich history. Born and raised in Perthshire, with the Highlands as his backyard, his love for the nation's stories was kindled by local storytellers and long walks through ancient glens.
This passion led him to pursue a degree in Scottish History from the University of Edinburgh. For over 15 years, Callum has dedicated himself to exploring and documenting his homeland, fusing his academic knowledge with essential, on-the-ground experience gained from charting road trips through the Cairngorms, hiking the misty Cuillins of Skye, and uncovering the secrets of traditional recipes in his family's kitchen.
As the Editor-in-Chief and Lead Author for Scotland's Enchanting Kingdom, Callum's mission is simple: to be your most trusted guide. He combines meticulous research with a storyteller's heart to help you discover the authentic magic of Scotland — from its best-kept travel secrets to its most cherished traditional recipes.
Latest Articles
Popular Articles